Instructions
- Make sure that you have a remote.it account.
- Download and install the remote.it Desktop Application on both computers.
- On the Mac, setup a new Device using remote.it Desktop.
- On the Mac, add a VNC Service on port 5900 using the remote.it Desktop.
- Install a VNC client on the Windows PC. In this tutorial, we will be using RealVNC Viewer.
- On the Windows PC, configure remote.it Desktop to Launch RealVNC Viewer in Windows
- Ensure that both computers are powered, awake, and connected to the internet.
8. Enable Screen Sharing
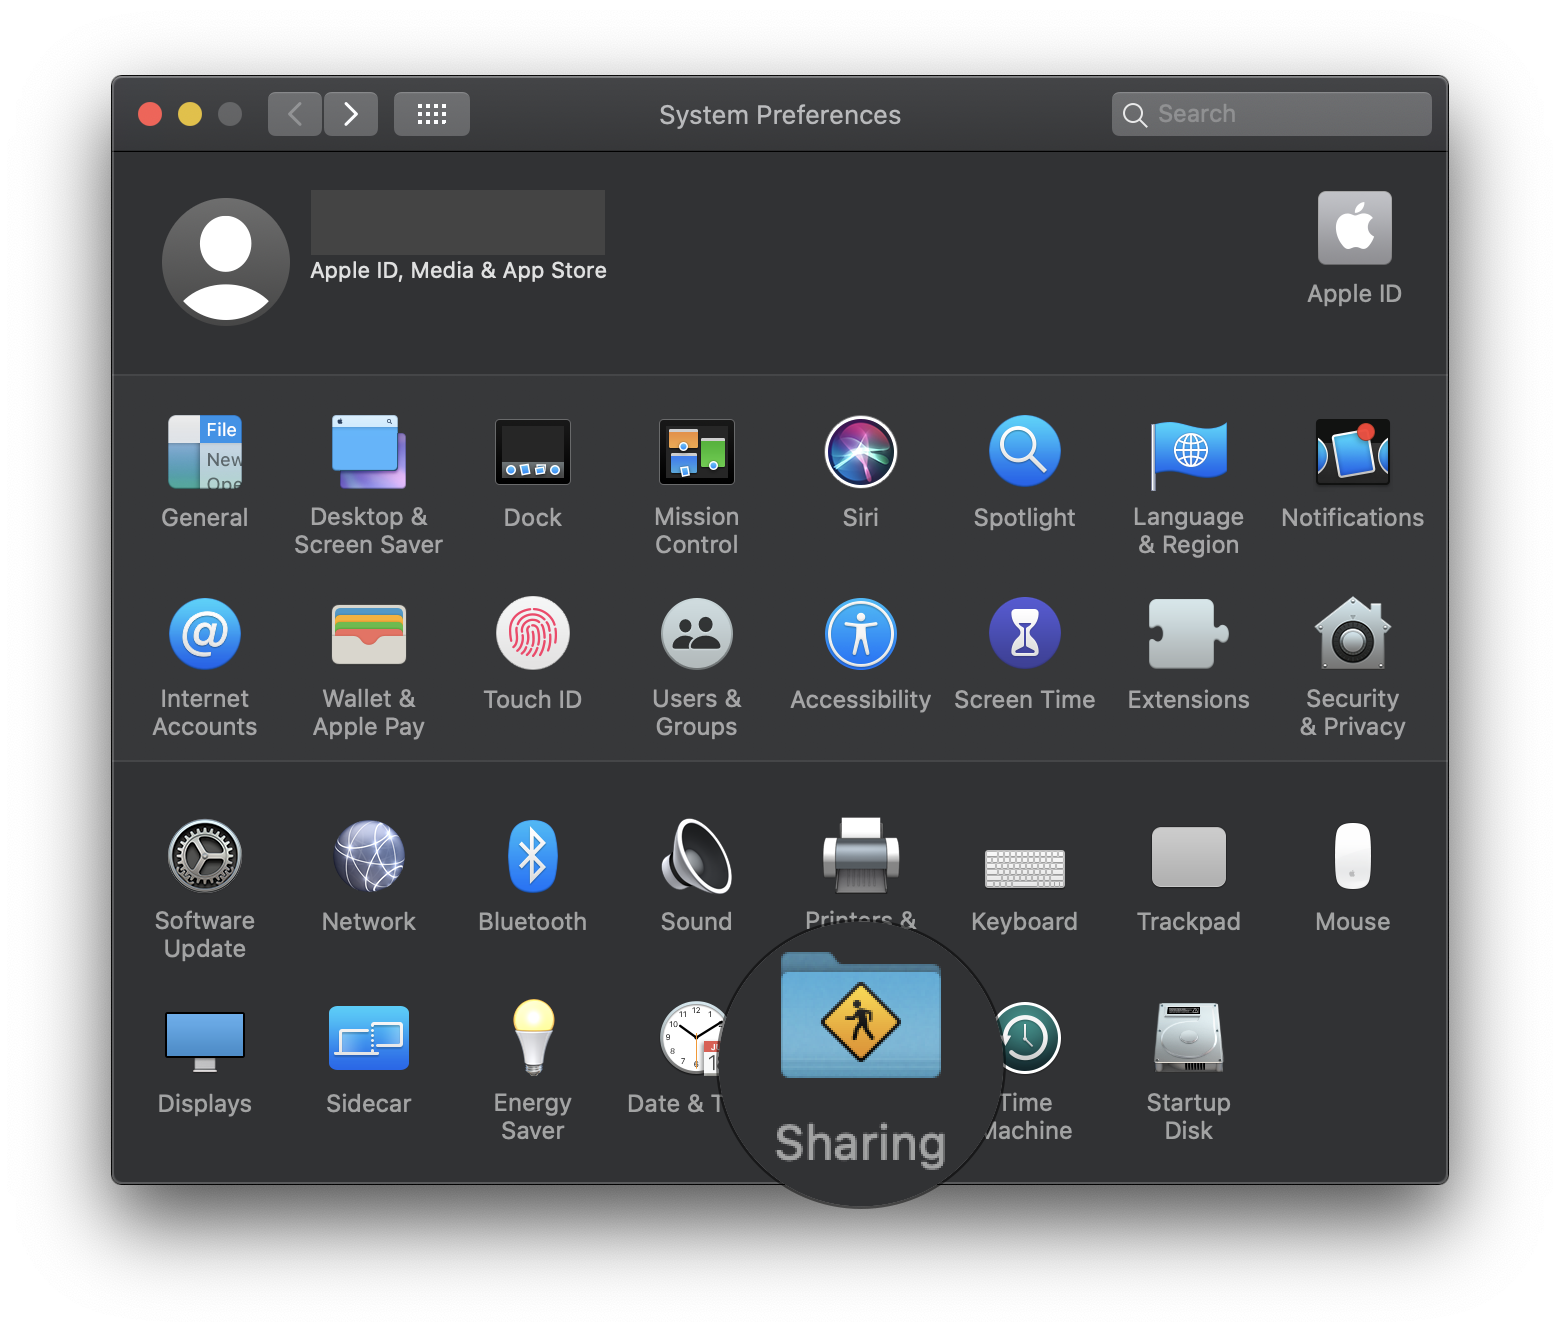
In order to remotely access a macOS computer using remote.it, you must first enable Screen Sharing.
To do this, open “System Preferences” and click “Sharing”.
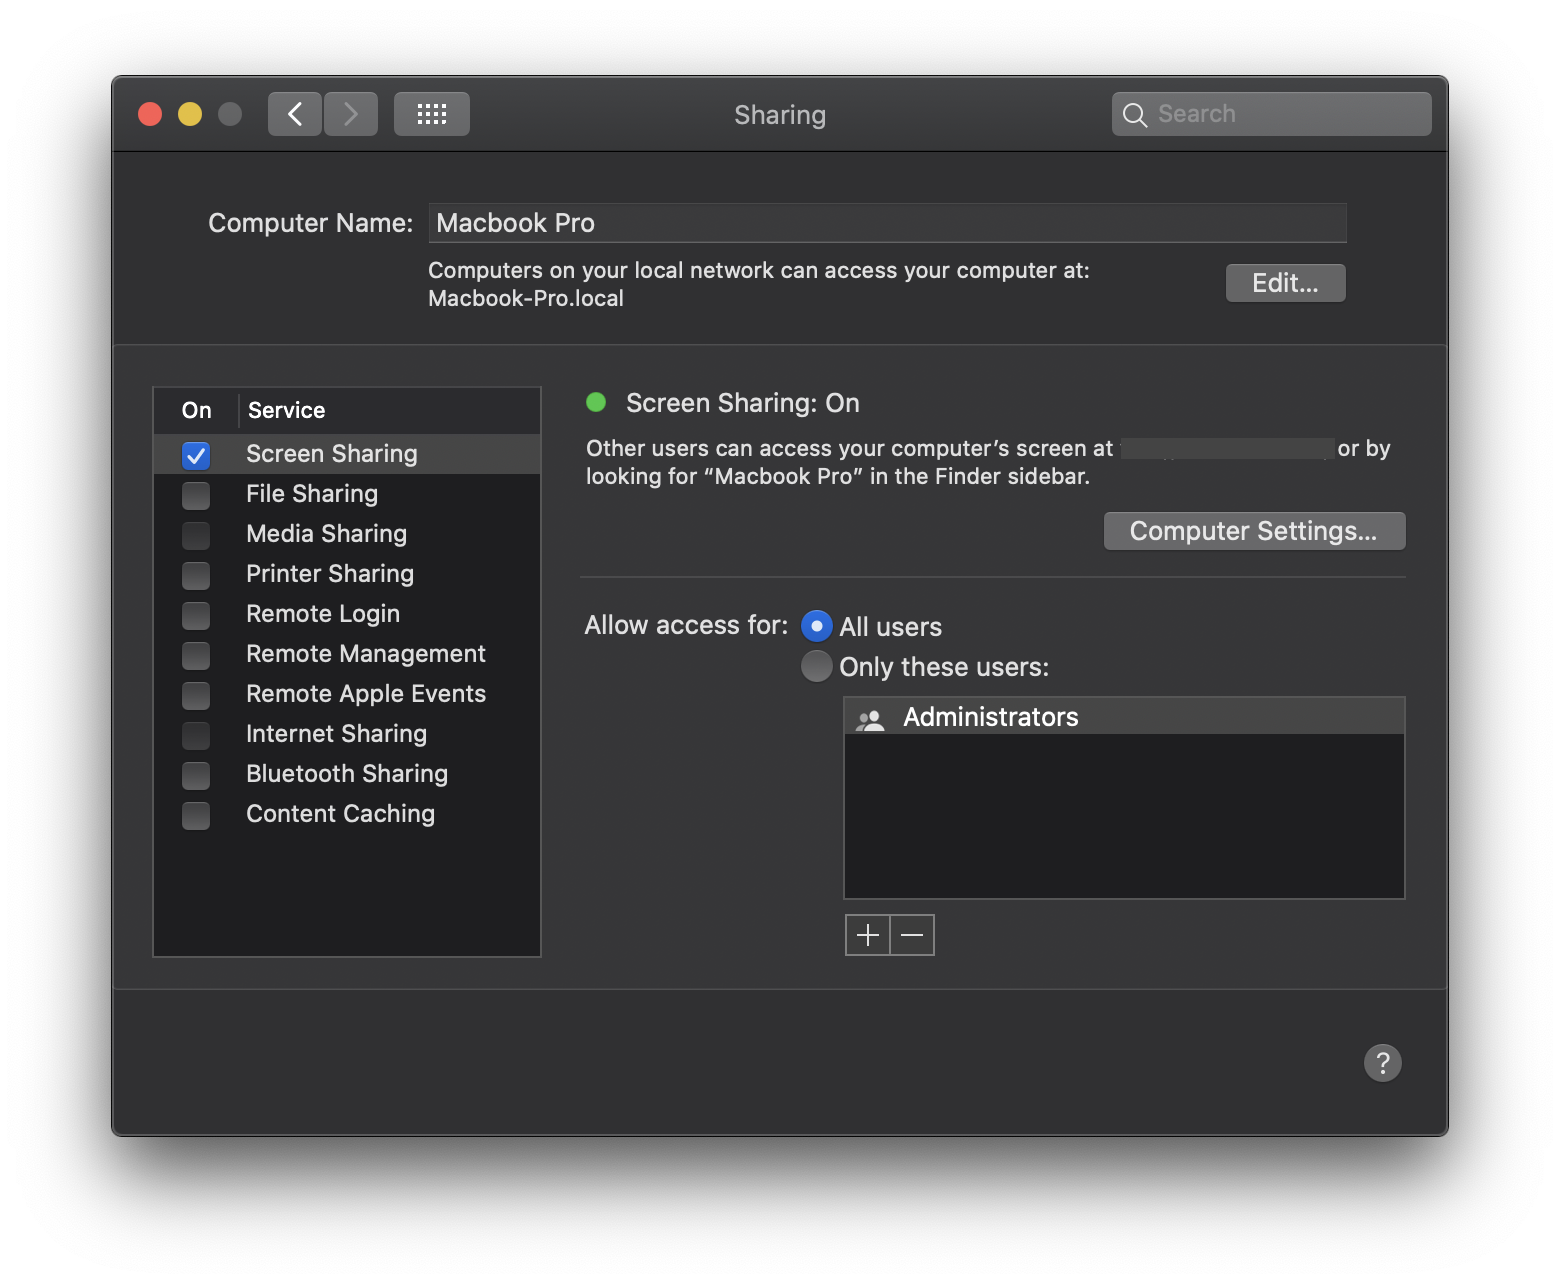
Check the box next to Screen Sharing. Screen Sharing will then be enabled and the icon will turn green.
Next to “Allow access for:”, make sure that “All users” has been selected.
9. Connect Remotely
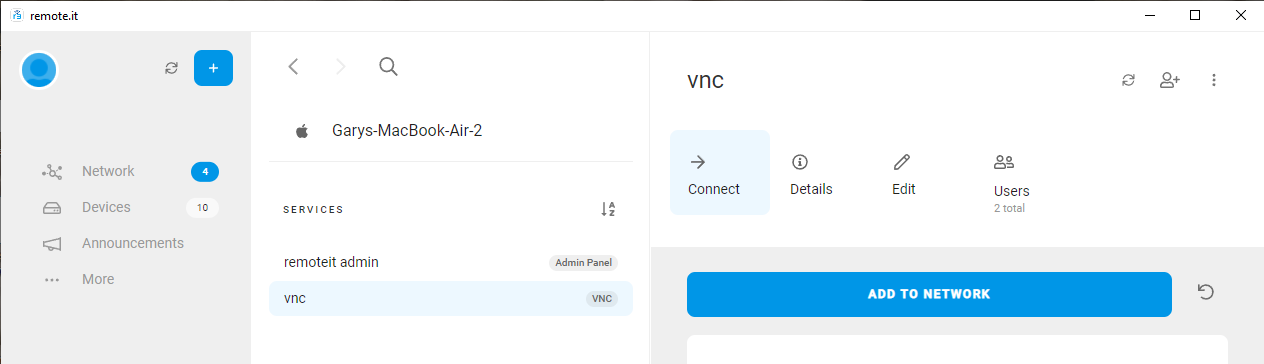
Now, open the remote.it Desktop Application on the Windows machine.
After a minute, the target macOS Device will appear under the Devices tab. Click on it and you will see the VNC Service you registered.
Click the “Add to Network” button.
Click on the "Launch" icon.

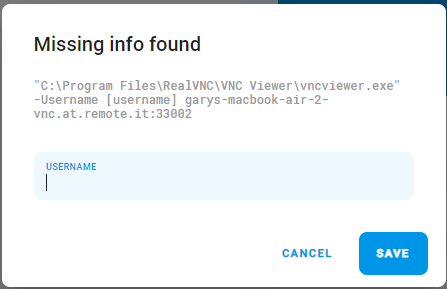
remoteit Desktop will prompt you for the user name.
You will see the following security warning.
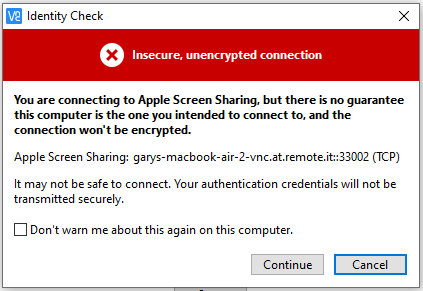
Click on "Continue".
VNC Viewer will ask for the username and password to the macOS Device.
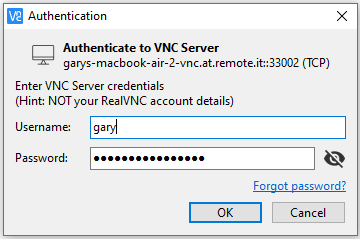
Enter the proper credentials and click “Ok”.
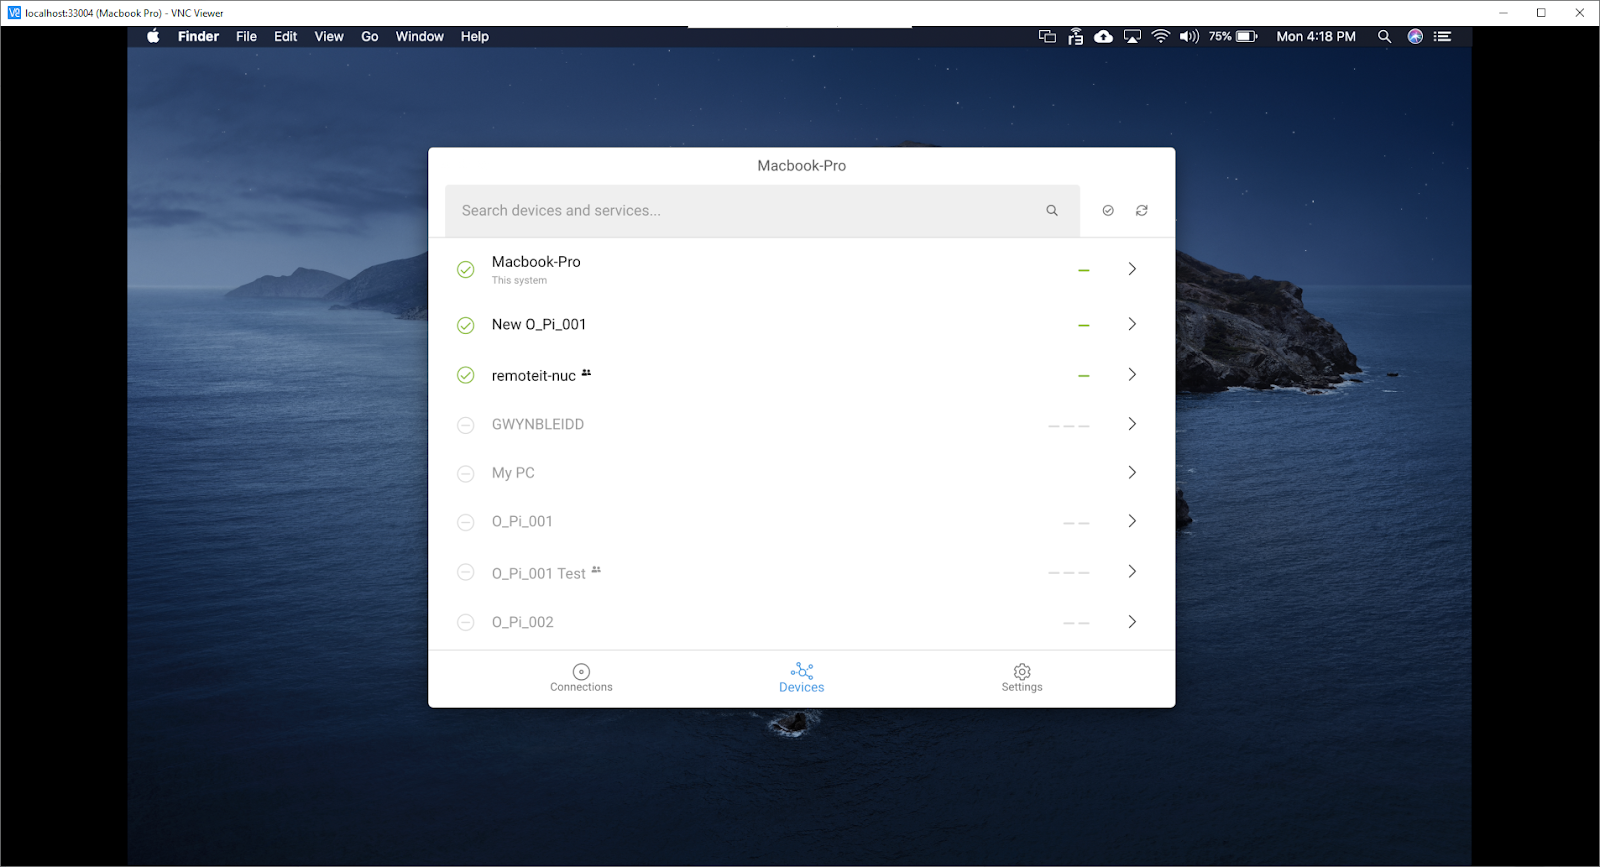
You are now remotely connected to your macOS Device!