All operating systems
For this demo we are going to show the use of the MySQL Workbench application on Windows. It should be much the same on other operating systems and SQL clients. Download and install the MySQL Workbench application before proceeding.
There is no specific remote.it Service type defined for "SQL" so in this case we have used the generic "TCP" Service type when configuring this Service.
In the remoteit Desktop application Devices view, click on the "TCP" button as shown:

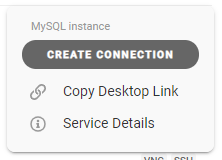
Next, click on "Create Connection":
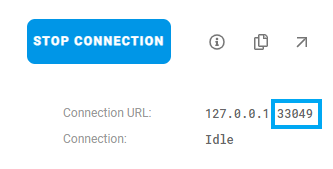
Once you see the blue button which has changed to "Stop Connection", click on "Connection Details".

Take note of the assigned port value. In this example it is 33049. We only need the port value because by default, MySQL Workbench creates connections to 127.0.0.1.
Now launch the MySQL Workbench application.

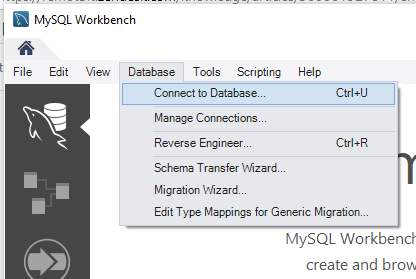
After the application opens, click on "Database...Connect to Database" from the Menu bar.
Enter the port value you received into the "Port" field, enter "demo" into the "username" field, then click on "OK".

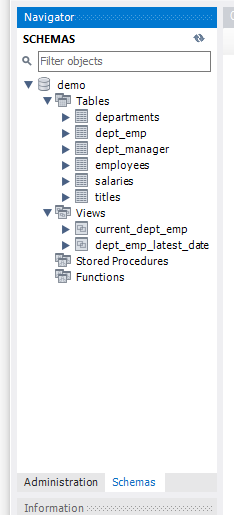
The SQL Database will open. You can now browse the database schema and make queries.